September 18 to 20, 2020
It’s been a while since I posted anything. Things got a little weird in August when a “bug” in a WordPress update suddenly caused my admin panel to speak German. Unfortunately, I don’t speak German and Google translate didn’t help, so I had to file a support request and wait a week for tech support to fix the problem. (The admin panel was still set to English, so it wasn’t a simple settings change.) I hadn’t really done much at my cabin, anyway, other than play in the river. Certainly not much worth blogging about.

September found Washington state engulfed in a massive cloud of unhealthy smoke from the worst wildfire season in recorded history. For the first time in more than a year, I spent the entire weekend at home. That was weird. I stayed productive, at least, and hauled three loads of brush and debris to the dump while clearing a driveway for my Sport Trac. Now, it’s just hurry up and wait for a trimmer to remove a few trees.
In the meantime, the poor thing is trapped in a claustrophobic temporary parking space, wedged between three massive Douglas firs and a fence. I’m sure it feels neglected every time Big Red’s engine roars to life. I know I feel some guilt always leaving it at home while sharing adventures with Big Red. My Sport Trac has been my constant companion and buddy for nearly 15 years. We’ve been through a lot together and logged nearly 170,000 miles. But that parking space is too small for Big Red, so Sport Trac is the one that (almost) always gets left behind.
But, I digress. By Friday afternoon, the smoke cleared and I made it out to River Song. This was to be a special weekend–I had help coming! I’ve been agonizing over hiring someone to assist me. For several reasons. First, I’ve taken a lot of pride in the fact that to date, I’ve done everything by myself. Second, my experiences in hiring help so far have not been very positive or productive. As in…not one person has ever showed up.
Third, this is my project; my dream. I do not want someone trying to take over by telling me what to do, how to do it, or what I’ve done wrong and pushing me aside while “rescuing” me from what they see as my inexperience and incompetence. That’s arrogance and I don’t want to deal with the drama. I know what needs to be done. I know how I want it done.
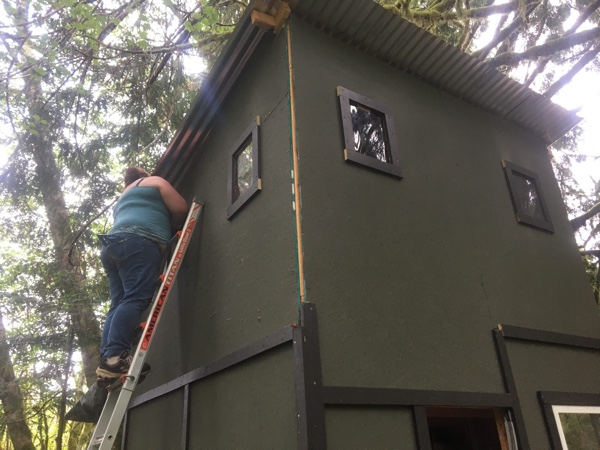
But, as much as I want to do all the work myself, I have ladder issues. Working on the upper floor exterior is just too far outside my comfort level, especially when it comes to the front of the cabin and that 40-foot cliff. So, I really had no choice–I needed to hire someone. I put an ad on a social media marketplace, and within minutes, not one but two women responded.
I was so happy, I almost cried. Yes! The prospect of working with another woman was a huge relief! She would understand where I was coming from. And, both had lots of construction experience. With either, I’d be in good hands. I debated which to select, and in the end, went with Amber, simply because she was the first person who responded. Since they were both equally experienced, it seemed as good a selection criteria as any.
Saturday, September 19
Amber pulled into to River Song promptly at 8:00 a.m. That was promising! From my previous experiences, I was fully expecting her to not show up. But she did, and right on time. And ready to get to work.
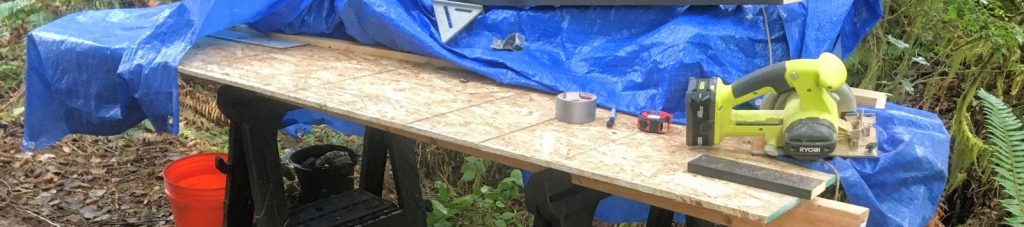
I gave her a quick tour and discussed what my to-do list. First task: Fix that too short upper wall. We talked about our options. We could remove the wall and replace it, or we could cut a small piece and patch it. With either option, I’d have to paint the new piece before it could be installed. In the end, I decided to patch it simply because it was raining and there was just no place to put a larger piece while it dried.
My temporary poster board patch made a great template. In no time, Amber had the new piece cut from an OSB scrap. And it fit great! While she started securing the upper floor roof braces, I painted the new patch and set it under the work table to dry. It would need a couple of coats of the oil-based primer, and then a couple of coats of the acrylic paint before it would be ready to install.
I already built the upper roof braces a few weeks earlier, adding new vertical cripple studs to the horizontal beams to more accurately match the slope of roof. Before I took the final step of securing them, I wanted to verify the load bearing capabilities of the horizontal 2×4 beams. Although it rarely snows here, it does sometimes, and we also get hail. I needed more time to think about it and do more research. However, after a couple of hours with some engineering and construction websites, I felt more confident. And, Amber assured me it was a good plan, too. After all, as she pointed out, I had a beam every 12 inches.
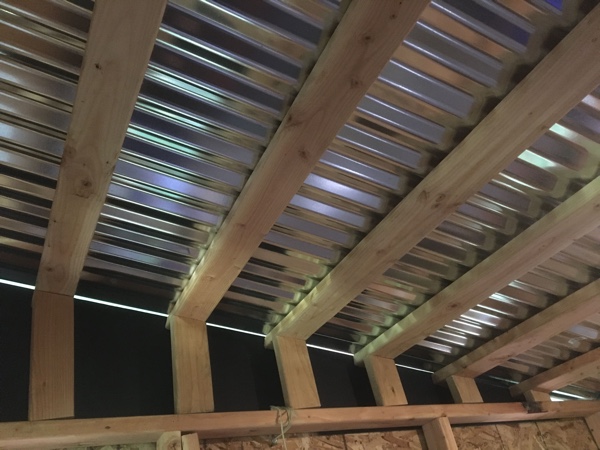
For additional support, we added horizontal 2x3s along the top plate. This provided a fourth surface to which to secure the braces (wall, top wall plate, metal roofing, and now horizontal support beam). With those in place, we lined up the roof braces and secured them to the frame. They fit great and felt solid. The only thing left is to secure the metal roofing to the new braces, but that would have to wait for another day.
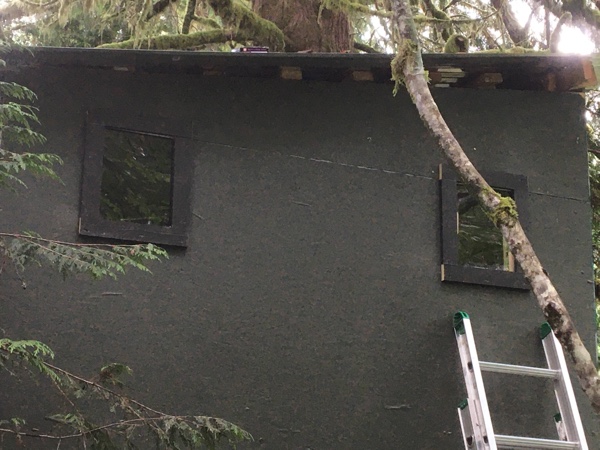
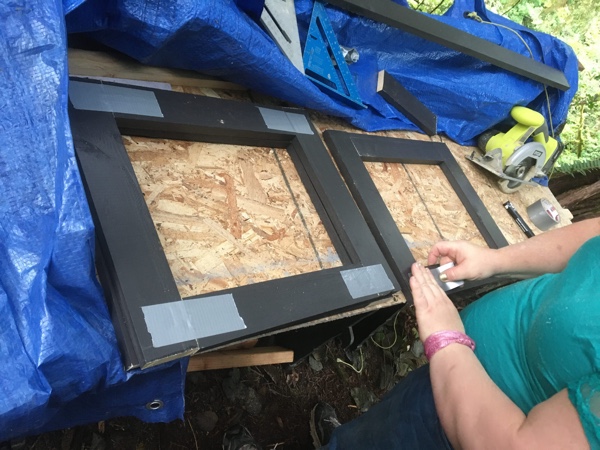
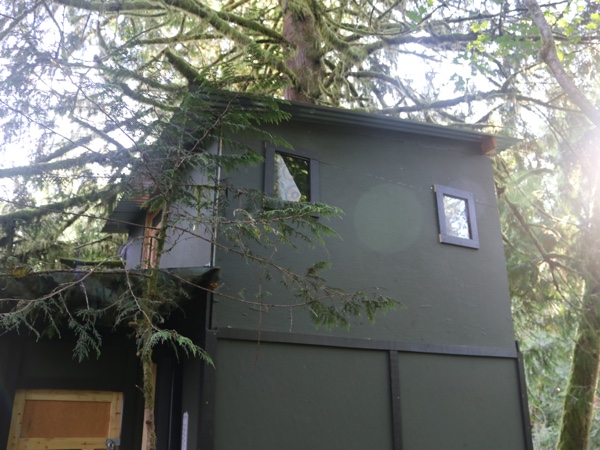
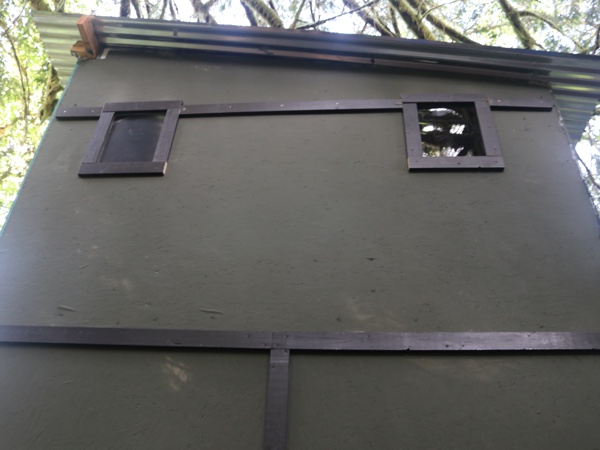
We turned to the next task: enlarging and framing my temporary windows. I really want to replace them with the real things, but for now, I’m keeping the 11″x14″ plexiglass temporaries. They work well; they’re just a little small and not energy efficient. When I originally installed them, I cut the openings smaller than the plexiglass and screwed them to the inside walls. But now, with someone who can climb a ladder, I could use exterior trim to hold the plexiglass sheets in place, enabling me to increase the size of the openings to fit the plexiglass. This would increase the size of each window by two to three inches on both the height and width. That’s a pretty significant size increase!
It worked great! Not only was each window bigger, but the trim improved the exterior appearance, making the cabin look more finished. By the time Amber enlarged and trimmed three windows, the wall patch piece was ready to go. And yeah, patching the wall rather than replacing it is not the ideal solution, but it worked.
Sunday, September 20
Fortunately, Amber was able to assist me today, as well. As with all of my projects, my lengthy to-do list was far too ambitious for one day. We had a full day ahead of us today, too.
First task–we replaced the temporary joist I’d put in when I installed the second floor. It ran only about 2/3 the width of the cabin, leaving a portion of the second floor hanging. It was plenty strong enough to support my weight and only a little bouncy, so it never bothered me. But, it sure bothered Amber, LOL! She couldn’t stand the sight of that unsupported floor hanging over the doorway.
Next, we added a support beam to the lower roof to make it strong enough to support weight. Now both are strong enough for a person to stand on, and then some.
After a quick lunch break, we finished the three upstairs windows and then spent the rest of the afternoon installing more trim. Finishing the roof would have to wait for another weekend, but at least, now, it’s ready.
It was a pretty productive weekend. We made it about half way through my to-do list, and I picked up some pointers about improvements I can do to make installing insulation and interior paneling easier. And, best of all, Amber was fun and easy to work with. No drama! I’m more confident moving forward with my cabin knowing I have someone I can call for tasks outside of my comfort zone.