
Saturday, April 18, 2020
I planned today as a light-duty weekend. It’s only been a week since my hand landed me in the ER, and it is not healed enough yet for me to use it much. However, next week is calling for rain, so I do want to finish the roof. It’s mostly done, so I should be able to finish it with one good hand in an hour or two. In addition, I purchased four 11″x14″ plexiglass squares to cover four of the six windows on the second floor. Installing these should be pretty easy, and it will be nice to be able to have a view again.
 I packed two burritos for a light lunch and headed out to River Song. Removing all those screws along the back was a PITA, but necessary. I planned to attach a 9′ 2×4 (nine-foot 2x4s are actually only about 8 1/2 feet long) just in front of the original 8′ 2×4, creating a space in which to sandwich the front wall. This should help strengthen the roof, as well as help secure it at the front. To do this, I needed to remove all the screws along the back so I could slide the roof back a couple of feet, giving me access to the front edge.
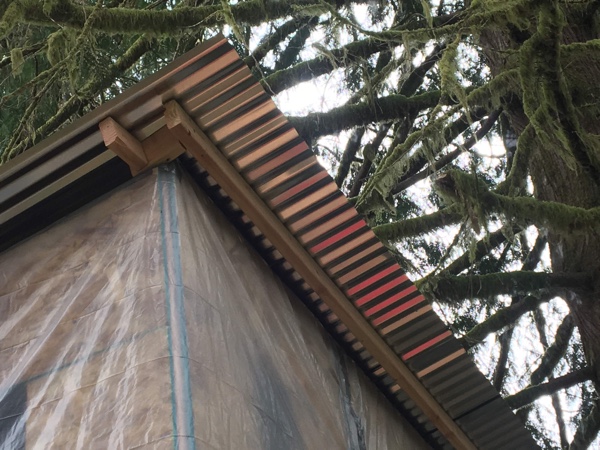
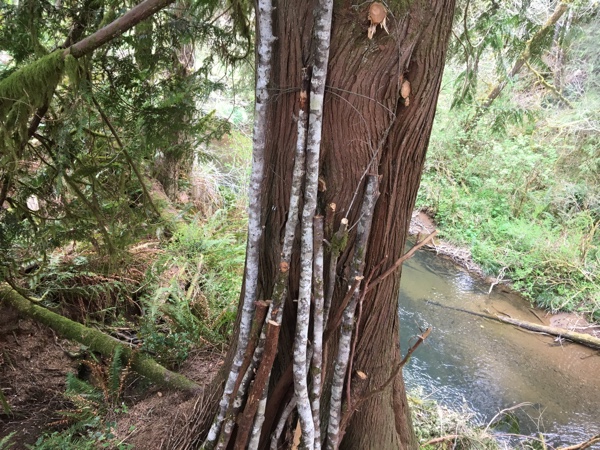
Well, that didn’t quite work as planned. After attaching the 9′ 2×4 and maneuvering the roof into place, I went down to get a view from below. And I’m glad I did because the 9′ 2×4 stuck out in front of the wall by about 3″.
It looked stooooopid.
 Well, it was a nice idea, but poor execution. Rather than mess with it anymore, I’ll wait until I install siding, and then put a piece of trim along the front edge.
I removed the 9′ 2×4 and set it aside. I’ll use it for something else.
With the long 2×4 now out of the way, I slid the roof forward into position and secured it to the front wall frame by driving in a half dozen 3″ screws from underneath the top plate. I used my Morakniv to trim the protective plastic sheeting along the edge, and stood back to admire my work. Nice!
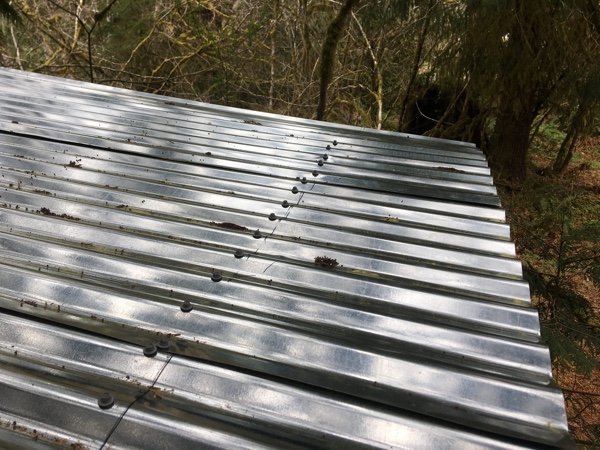
The back was a different story. I pulled the first sheet of roofing to the left to line it up along the south wall of the cabin and secured it with a couple of screws. However, no matter how hard I tried, I couldn’t get the second sheet to move far enough to the left to line up with the first. Close, but not quite. The best I could do was to get it within a half a hill (or valley). I just needed more hands. But also, I was concerned about the amount of tension I was placing on it: Could it potentially cause any of the screws to tear larger holes in the metal?
 I decided it was better to have the metal roofing slightly askew than risk either tearing it or me (again!). Close was good enough. This is just a recreational cabin, not a house. Mistakes and “good enough” are OK. I went ahead and secured the second sheet and then removed the screws in the first sheet, allowing it to relax enough that the two fit together nicely. The rest of the sheets fell into place with a little bit of tugging, and then I was done. It is what it is.
While I was up there, I used my saw to trim some of the cedar branches that were touching the roof and tangling in my hair. I could just imagine these branches screeching eerily across the sheet metal during inclement weather. Nope, don’t need that!
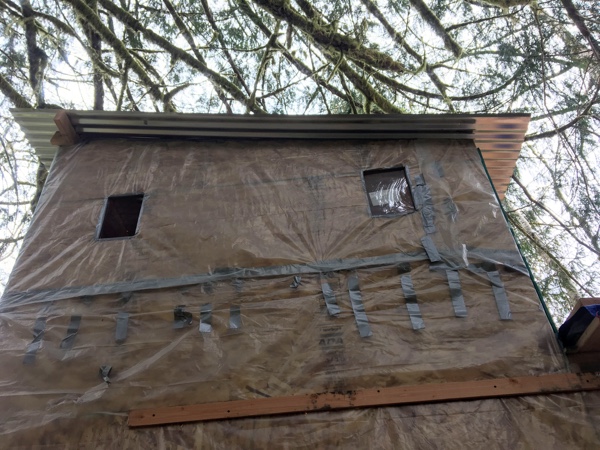
I then turned my attention to the inside and slit an X in the plastic sheeting covering one of the side windows. I pulled the sheeting inside and taped it to the wall to secure it, and then lined the opening with duct tape to strengthen the plastic where it touched the edges of the wood. The long, narrow window reminded me of an arrowslit. Arrowslits would be kind of fun, but sadly, not very practical.
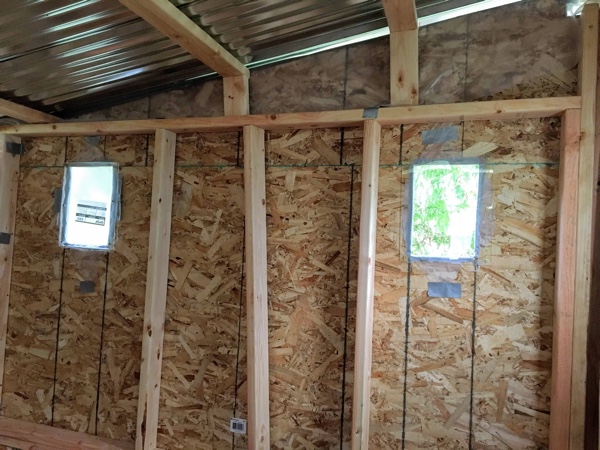 After running a line of clear silicone around the edges, it was ready for the first window. A plexiglass panel fit nicely over the opening, leaving about an inch of overage on all four sides. I had already pre-drilled six screw holes, so I used six 1″ screws to secure it to the OSB.
It worked great! I now have a nice little window with a view of the river.
I went to add plexiglass to the second opening in that side wall. The first tube of silicone was empty, so I opened a second tube and squeezed a line around the edges of the opening.
The silicone was white.
I wanted and ordered clear, not white.
I checked the tube, and it said the silicone was clear. Clearly, the tube was mislabeled.
 But, I had to continue. I couldn’t just leave that nasty mess on the wall, and I now had an opening in the protective plastic sheeting.
Reluctantly, I pressed the plexiglass into the silicone. Unlike the first one, it was ugly and messy. The opening was slightly bigger than the other, and the plexiglass didn’t have as much overage. And, the silicone squished out onto the wall and the plexiglass and my fingers. But, there wasn’t much I could do about it.
I kind of ran out of steam at this point. The first window looked fabulous, but the second was disappointing. I didn’t want to put up the other two pieces of plexiglass if they were going to leave white crap on the walls. And I wanted a hamburger. All I could think about was getting my hands on a hamburger.
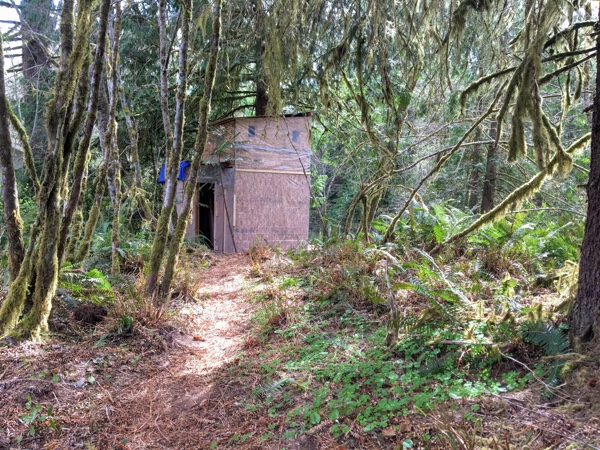 I was OK with knocking off early. I’d put in only four hours of work, but it was enough, considering I had stitches in my hand. I put away my tools, cleaned up the cabin a bit, and spent some time fiddling with the doors, trying to make them more secure. And I sat on the deck and listened to the birds and the river and watched the clouds clear from the afternoon sky. I think my cabin is ready to be enjoyed now. I would like to get a permanent floor on the upper story, but if the temporary one is all I have for a while, it’s OK. The cabin is strong and secure and safe.
And there’s now a well-stocked first aid kit in the mudroom.
Sunday, April 19
I decided not to head out to River Song today. I really do need to let my hand heal, and Big Red guzzles almost ten gallons of gas on every trip. But, I was going stir crazy with all the parks closed because of the plague, and I just couldn’t spend the day sitting around. So…
 I decided to use the dinette cushions from my travel trailer and build a daybed\sleeping platform. I used a couple of plywood scraps to piecemeal together a platform large enough to hold the two larger cushions, and then I cut out pieces of 2×4 for the frame. Because it will be heavy and bulky, I’ll have to assemble it on site. But, that should be easy.
And, I discovered who “Tina” is. Remember the chocolate treats I found in the back of my truck two weeks ago? Yes, that Tina! She walked by as I was retrieving lumber from the back of Big Red, and I thanked her for the treats and the scrubber. She said the scrubber is kind of a joke–she calls it the “COVID-19 scrubber” and hands them out to all her friends and family. Ha ha! I like that.
In addition, I found a large scrap of unused berber carpet on FB Marketplace for $20. It should be just big enough to carpet the upstairs, making the room nice and cozy. I’ll install easy-to-clean laminate flooring downstairs.
I’m ready for next weekend!