April 4 and 5, 2020
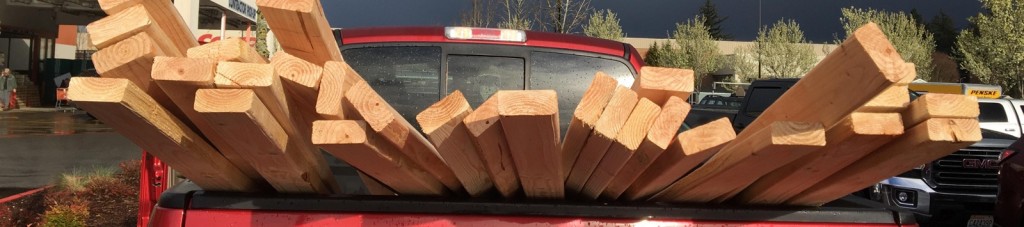
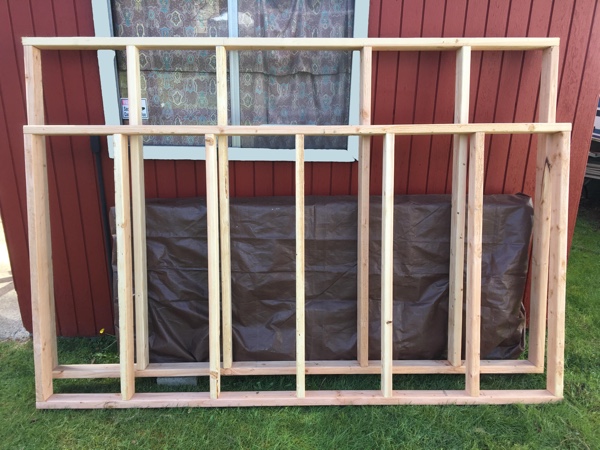
Another busy weekend working on my cabin! This weekend’s plans include adding the second floor and a roof. I picked up another truckload of 2x4s from Home Depot earlier in the week and already had all four upper walls framed and ready for installation. By Friday evening, Big Red was loaded down and ready to go.
 I swung by Home Depot again on my way to River Song and picked up two more of sheets of OSB, five 10′ corrugated metal roofing panels, and more screws. I was now ready for the day’s work. Building a second floor and adding a roof should be easy, right?
I pulled into River Song and hauled everything to the cabin site. I’m not really sure how far it is from the road to the cabin; maybe about 50 or 60 yards. But my back has been bothering me off and on since I pulled a muscle last month while hauling brush, and it’s affected my ability to carry heavy objects. I picked up a back brace before leaving Olympia this morning; I’ve never used one before, so I hoped it would help. Also, I lightened today’s load a bit by removing some of the studs in each piece, reducing the weight of each frame section. Removing the equivalent of a single 2×4 lightened each wall frame section by nine pounds, which is pretty significant. Since the frames were already marked and the screw holes drilled, it would be easy enough to reinstall the studs when I’m ready.
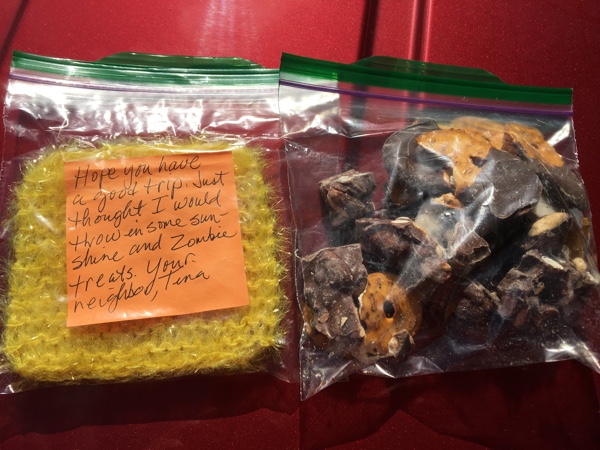 Big Red was almost unloaded when I noticed something in the corner of the truck bed: some plastic and an orange piece of paper. Did someone throw some trash in the back last night or when I was at Home Depot? It wouldn’t be the first time someone had done that. I finished unloading, and then climbed in the back to check it out. The “trash” turned out to be two sandwich baggies, one containing chocolate treats, and other containing a hand knitted yellow pot scrubber with an orange sticky note: “Hope you have a good trip. Just thought I would throw in some sunshine and zombie treats. Your neighbor, Tina.”
Awwww! I’m not sure which of my neighbors is Tina, but I surely appreciated those treats! What a surprise! I munched on chocolate as I tackled the doors. (Yes, I did eat food a complete stranger left in my truck. Because…chocolate!) Before I left last Sunday, I discovered both doors were out of alignment. The front door was so misaligned, I had to hit it with my rubber mallet to get it to close, and then adjust all four lock hasps. Adding more weight to the structure would probably make it worse, so I needed to fix it before I did anything else. I hadn’t installed the headers yet; that might help.
 Interestingly, as soon as I installed the headers, the doors came back into alignment, needing only minor adjustments of the lock hasps. I guess I should have installed them a long time ago! D’oh! What a great learning experience!
I tackled framing the second floor next. First, I had to remove all those stupid roof tarps. Lots of tarps, lots of duct tape, lots of ties, lots of cedar branches and plywood scraps to pull down. Removing the redneck roof took a while. Fortunately, the weather was good, so I didn’t have to worry about anything getting wet, and I could leave it off overnight.
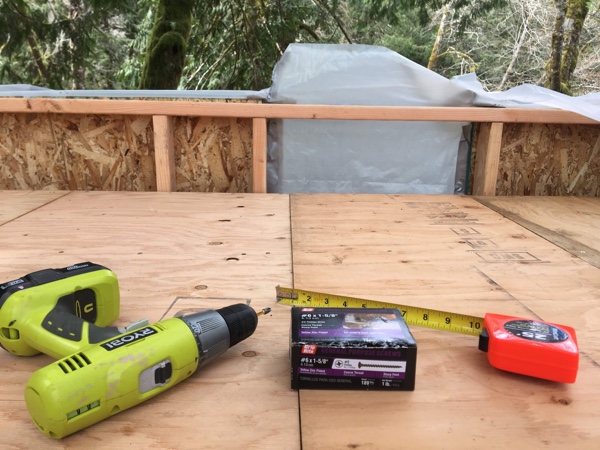
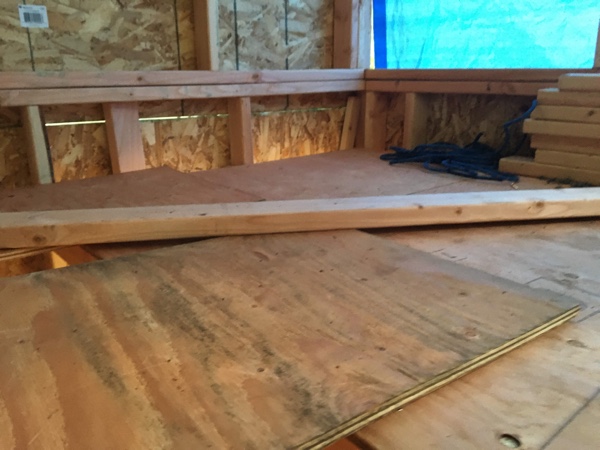
Once everything was out of the way, I screwed down some plywood scraps to the second-floor joists, creating a temporary floor. I also had to remove one of the joists so I had room to maneuver the wall frames up onto the second floor.
When that was done, I got to work building the second story. The floor for the second story is about ten inches below the top of the existing lower floor wall. The front upper wall will add about another 5 1/2′, and the back upper wall will add about another 4 1/2′. Likewise, the side wall sloped from 5 1/4′ in the front, to 4 1/4′ in the back, supporting a sloped roof.
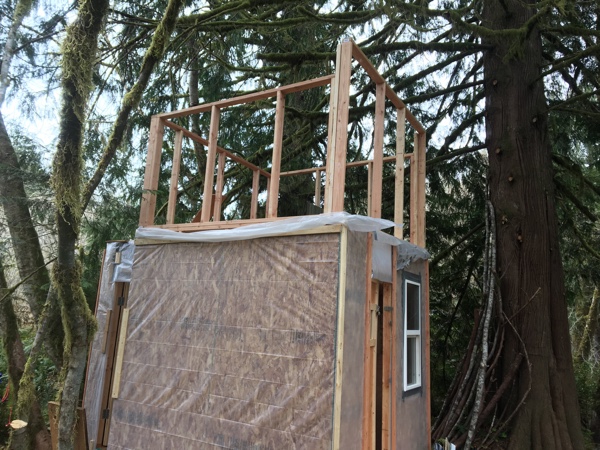 I decided to install one of the side wall frames first, which would give me something with which to support the front wall frame. After shoving the frame up on the second floor, I climbed upstairs for the first time. The view was awesome, but I have to admit it was kind of scary being up there without any walls or railing. I couldn’t convince myself to stand up, so I crawled to the north side of the cabin, scooting the wall frame along the floor, and lifted it awkwardly into place. Fortunately, it lined up right away.
I added about two dozen screws to secure it in place and then climbed back down the ladder to get the front wall frame. It was bigger and heavier, but it, too, went in without any issues. However, I did have to stand with this one. It was just too big and heavy, and I also had to secure it to the wall frame, which meant I had to stand to line up the adjoining sides of the two frames.
It was scary, but I did it.
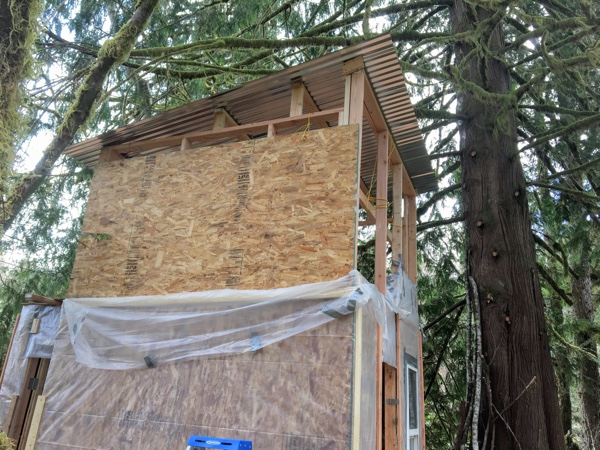
The second side wall and back wall frames went up as easily as the first two. In no time, the entire second floor was framed out and ready for the roof. For that, I had five 10′ sheets of corrugated metal roofing. I probably should have bought a couple of longer 2x4s to support the roof, but I hadn’t thought of it, so I used what I had.
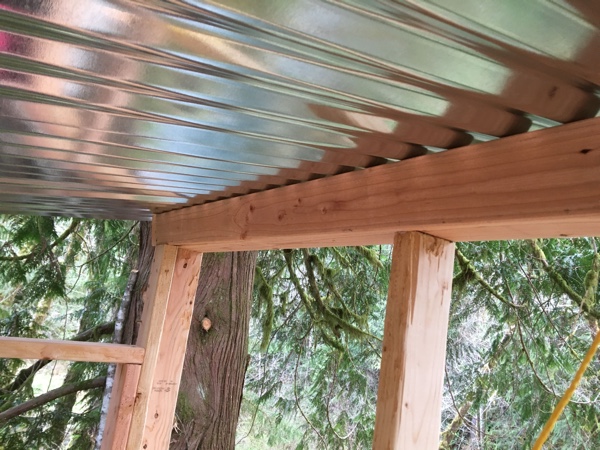 I laid a 2×4 across the top of the second-floor frame and then lined up the sheets of roofing, overlapping each by two full hills. Because my 2×4 was only 8′ long, the roofing stuck out over the ends by about six inches on each side. I could figure out a solution for that later. In addition, the 10′ sheets would overhang the front and back of the 8′ cabin by about a foot.
For now, I would attach the roofing sheets to the 2×4 and then pull the entire thing over my head and hook it over the front wall frame, using the front wall frame to hold it in place. I could then drive screws through the wall frame, into the roofing 2×4, securing it into place. It would be super easy and enable me to install the roofing without having to climb any scary ladders.
Unfortunately, I’d forgotten to bring a nut driver for the roofing screws. D’oh! I searched through my tool bags and found a bit holder that fit the screw head perfectly. It worked great! I lined up all the panels and used a Sharpie to mark the screw holes. I’m not sure how many screws I should use, but I had bought plenty, so I went ahead and put a screw in every valley. The screws were supposed to be self tapping, but that was not my experience. I used my second drill to predrill small starter holes, and that speeded up the process significantly.
 With the front edge now secure, I hoisted up the roof on my shoulders and pulled it forward to the front wall frame. It was heavy. Five ten-pound metal panels and one nine-pound 2×4, plus the weight of the screws. And the friction of the tail end dragging across the top of the back wall. I tried to lift it over the edge of the 6′ tall frame, but didn’t get it forward far enough, and it dropped onto the top of the side wall frame studs.
Wait…..
It fit perfectly and was rock solid. If I put it on the inside of the front wall instead of on the outside, it would be supported by both side walls and the front wall, instead of just the front wall. Three points of contact would make it more structurally sound. And as an added bonus, it was actually a couple of inches higher, providing more head room.
I liked it. It was solid. I’m going to go with that. I drilled a couple of screws into the frame to secure it.
I laid out more plywood scraps on the roof of the mud room extension until I felt safe standing on it. This part of the cabin is not going to have a second floor. Instead, it will have a separate roof, which I will install later. For now, it’s a great place to stand while securing the back of the new roof. The metal panels lined up perfectly at the back, but unfortunately, I didn’t get in more than a half dozen screws before my bit holder stripped out.
Well, it was a good time to call it a night, anyway, especially since I had also apparently cut myself on the sharp metal, despite my gloves. Blood was pouring down my arm and all over the roof. But, it was just a flesh wound.
I was pretty happy with the day’s work. I had a second floor, and I had a roof. And amazingly, my back pain was gone.
Sunday
Today’s plans included finishing the roof and attaching the OSB to the upper floor walls. My biggest concern was lifting those 45-pound sheets of OSB twelve feet up the side of the cabin. That’s a lot of weight for one person to lift. After a lot of thought, I decided to try ropes tied to a couple of eye screws and then just hoisting the sheets up the side of the cabin.
 But first, the roof. I remembered a nut driver this time. My starter holes were already predrilled, so it took only a few minutes to finish the roof. I also added a couple of purlins to help support the middle. It looked great! I was really happy with it. No more tarps! However, I will have to bring in someone later to add some screws to secure the roofing to the purlins, but it will do for now.
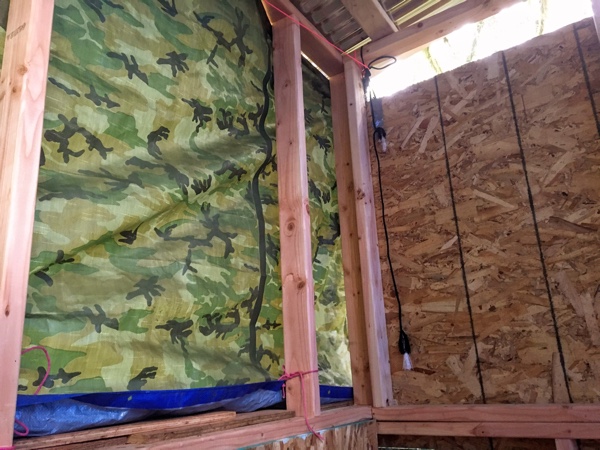
Next, the second floor walls. I decided to do the north side wall first. I screwed two eye screws along the side and tied a length of climbing rope to each. I wasn’t sure about those eye screws. They were pretty big, but the OSB is just under a half inch thick, and that’s not a lot of wood with which to lift 45 pounds. Best to make sure I kept the ground clear and never stand underneath it.
I climbed back up onto the second floor and slowly hoisted the OSB, first one side, and then the other, slowly inching it into place. It was heavy, but I did it. Except it was crooked. The plastic sheeting was still in the way, even though I had pulled it out of the way the best I could. And, the OSB was about four inches too far to the back. And I couldn’t slide it into place because of the plastic.
 I climbed back down and used my Morakniv to slit the plastic sheeting along the corners and pulled it out of the way. One end of the OSB sat precariously on the edge of the furring strips holding the plastic sheeting in place, while the other end hung out over empty air. Only my ropes kept it from falling. I wanted to lift the free end onto the furring strip, as well, but I was afraid the entire thing would fall off, so I secured the other end with a screw.
It worked! The entire bottom edge of the OSB was now supported by the furring strip. All I had to do was remove the screw and slide the entire thing four inches to the right.
Except the screw refused to budge.
Apparently, there was now too much tension on the screw, and it refused to back out.
Bloody hell! I’d need to use my sawzall and cut it. Using the sawzall, however, might cause the OSB to fall off the furring strip, so I added a second screw in the middle of the OSB. I made sure it would back out first, and then tackled the first screw with the sawzall.
 The sawzall wouldn’t cut it.
I whacked at it with my hammer. No joy.
I tried my wirecutters.
Nope.
I went back to my hammer and moved the screw back and forth and back and forth until the bloody thing broke off. Unfortunately, it still left almost an inch of screw sticking out of the wood, but whatever. I would deal with it.
I picked up my drill and went to remove the second screw.
Not again! The second screw refused to back out.
I gave up. I was done with this. Clearly, this wasn’t going to work. I decided to undo my ropes and let the OSB fall free. I didn’t care what happened to it. If it broke, I would use the pieces for something else.
Ropes free, I pushed the OSB to let it fall.
It bounced back and refused to fall. I kicked at it to try to push the screw through, but no luck. Now that it was up here, I couldn’t move it into place, nor could I remove it. I couldn’t even give up on it. By this time, I had had almost four hours into trying to install this single sheet of OSB. I had only the one ladder. I was constantly going up and down the ladder, folding it, moving it in and out of the cabin, resetting it up again, and so on. Every bloody time I did something. It was time consuming.
 But I had to do something. I couldn’t just leave it there.
For safety reasons, I retied the ropes, and then climbed back down the ladder, folded it up, moved it back outside the cabin, set it up, and tackled that screw again. With a hammer. Hard. I beat the crap out of that thing.
Ping!
The screw broke at the frame, sending the head ricocheting off the side of the cabin.
Yes! It was free!
I tried to slide the OSB into place, but it still wouldn’t move. The first screw, now headless, was still holding it. To make sure it didn’t fall on my head, I’d have to push it off from up above.
Back down the ladder, folded it up again, moved it back inside the cabin, set it up again, and back up the ladder.
I kicked the OSB to free it from the broken screw. It popped out, and the OSB slid easily into place.
I hurried down the ladder, moved it back outside, set it up again, and screwed the OSB to the frame, once and for all, before it had a chance to move. I finally had a wall!
 I decided to do the south wall next. As I repeated the process, I fully expected it to take another four hours.
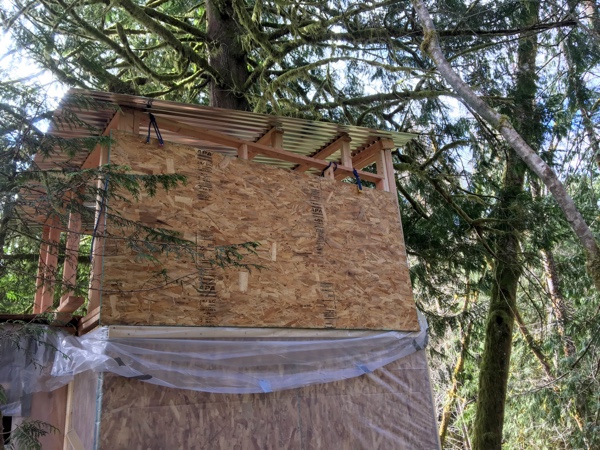
But, it didn’t. It took only fifteen minutes.
Unbelievable!
It easily lifted into place on the first try. I was so happy! I decided to add the back wall and then call it a night. But, no matter what I did, I could not get that 8′ sheet of OSB up on the roof. I couldn’t hoist it up as I had the other two because the extension had no upper story frame from which to hang it. Nor could I shove it nine feet up the side of the back wall. I couldn’t bring it up through the inside, either. I tried for about two hours, but that sheet of OSB was not going to cooperate.
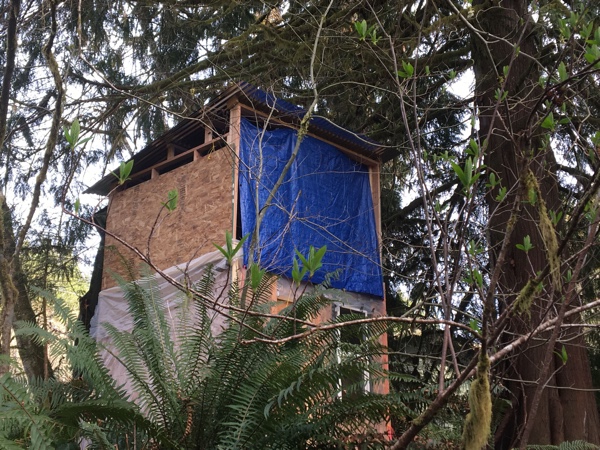
Screw this! I decided to call it a night. Sadly, I had to rehang the tarps over the open front and back to protect it from the weather. I hate dealing with those tarps, but hopefully, this will be the last time.
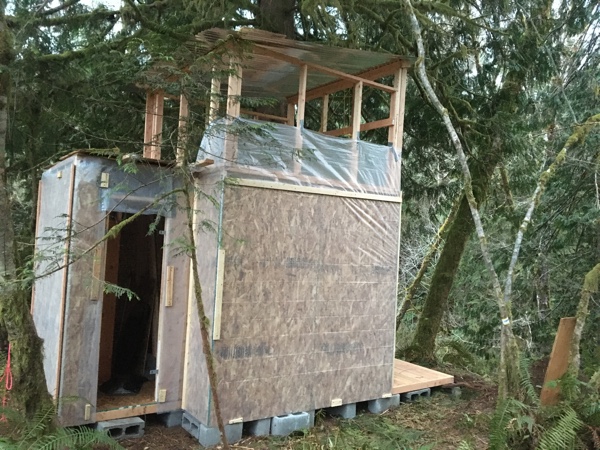
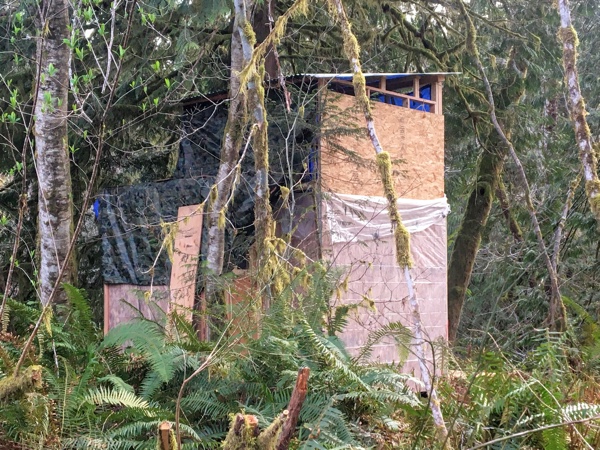 It took about an hour, and then I was able to pack up my tools and head home. As I was leaving, I turned to take a photo of the cabin from the back, and I was struck by how quintessential Alaskan it looked. It was perfect. Of course it looked Alaskan! I built it.
The drive home gave me time to think about what I was going to do and modify my plans. Originally, I had planned to put an emergency exit in the front upper story wall, but if I put it in the back, then I could cut the OSB into three smaller pieces. These smaller pieces would be much more manageable, and it would be easier to put a door in the back than in the front.
Excellent solution! Now I know how to fix this. And, I like this plan better. I’m glad I wasn’t able to get that sheet of OSB up on the back roof, after all.