Saturday, March 28, 2020
Like many people around the world, I feel like I’m going nuts being locked up inside all the time. Fortunately, I have a place to get away from all this madness while also practicing social distancing. And also, fortunately, building supply stores are still considered “essential services.” Which means I can continue building my cabin.
I swung by Home Depot to check out their selection of glass on my way out of town. I had no specific plans in mind for the weekend, other than finishing out framing the mud room, which shouldn’t take long. So, I thought I might experiment with making my own windows.
 Home Depot was eerily nearly empty for a Saturday morning. Signs directed everyone to use a single entrance. I snapped on my latex gloves before grabbing a cart. Inside the store, duct tape marked off six-foot intervals in front of the checkout terminals, enforcing the social distance requirement.
I headed to the glass bay at the back of the store, passing through the window section on my way. Suddenly, a price tag caught my eye.
Wait! What?
I took a closer look.
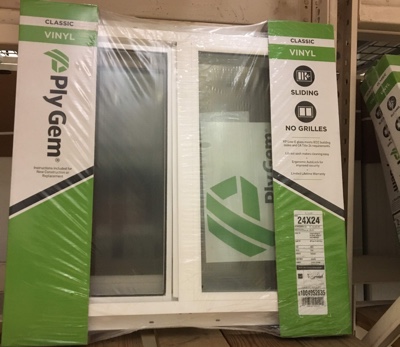
A 24″x24″ window for $79? And a 24″x36″ for $98?
Well, f*** me! I thought windows would be hundreds of dollars! Seventy nine bucks for a professionally made window is cheap! For $79, I could get a standard-size, professionally made, double-pane, sliding window. Sure, I could make a window for less than that, but it wouldn’t be double pane, nor would it likely be standard size. And, it sure as hell wouldn’t be professionally made or sliding!
 Screw making my own windows! I’m going to buy them. I can’t afford to buy them all at once, but I can certainly buy one a payday. And, I don’t need that many. At least, not for the lower floor. Probably four of the 24″x24″ would do, plus a new 24″x36″ to replace the used one I already had. That’s less than $500! For now, however, I’ll go ahead and install the one I have and plan to replace it at a later date. Since it’s a standard size, it will be easy to replace.
Happy day! I picked up some 2x4s and some furring strips, just in case I might need them, and then swung by the grocery store for a sandwich and salad for lunch. I wasn’t going to go hungry today. I had just a few little projects; nothing that would cause any issues if they weren’t completed.
When I got to River Song, I saw right away the redneck roof was sagging quite a bit in the middle. It has been raining pretty hard all week, and quite a bit of water had pooled up. I had hoped the plywood would be sufficient support for the roof tarps, but clearly not. I had a half dozen 96″ 2x4s stacked in the corner, so I used these to shore up the sagging plywood. The weight of the water made the plywood roof supports really heavy, and I had to kick the studs into place. But, it worked. Water poured off the roof and over the sides of the cabin for several minutes. Luckily, I had enough 2x4s to shore up each plywood scrap until I can install a proper roof next weekend. 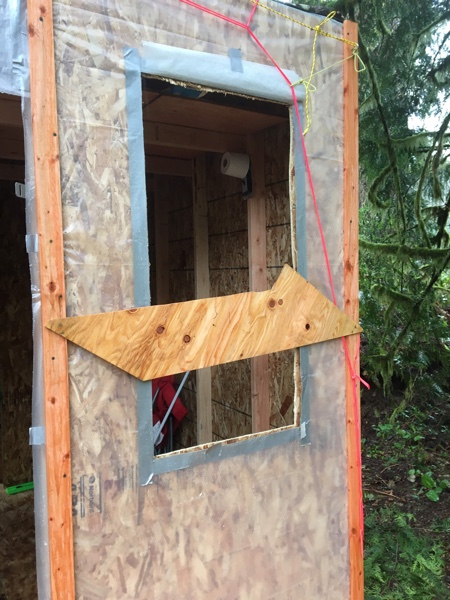
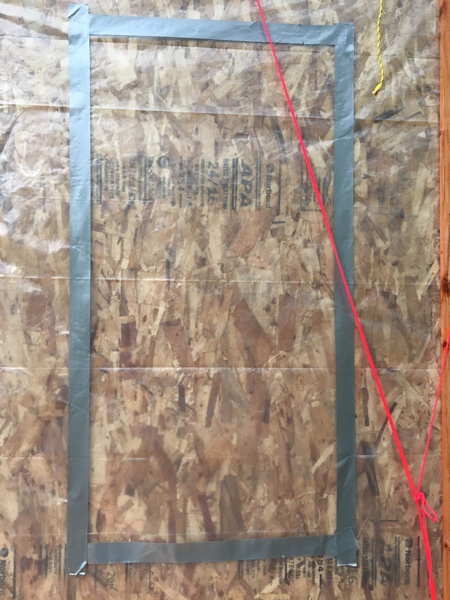
After the roof had a chance to drain, I removed the 2x4s for now and got right to work installing the window. I didn’t have a Sharpie to outline where the window would go, so I used duct tape. I was afraid the duct tape wouldn’t stick because of the rain, but it did. I slit the plastic sheeting on the sides and bottom with my Morakniv, exposing the OSB wall. I wasn’t sure whether I would need to cover the opening again, so I left the plastic attached at the top and taped it out of the way. That seemed to work really well.
With the plastic sheeting out of the way, I used a 1/4″ wood drill bit to drill holes in the OSB at the corners of the future window opening for my sawzall blade. It took only a few minutes after that to sawzall out the opening. I don’t use my sawzall very often, and the cuts were not very straight. Partly because I could not see the blade as I was cutting, and partly because I discovered toward the end that the blade cuts more cleanly when the sawzall is pushed firmly against the wood. Clearly, I need more practice. However, it doesn’t matter. Any gaps and jaggedy bits will be covered by the framing, siding, and trim.
To keep the window from falling through as I tested it, I screwed a plywood scrap across the exterior of the opening. I tested the window fit a couple of times and made additional cuts as needed.  Once it fit, I attached vertical 2×4 studs on either side, and a horizontal 2×4 sill and header. Everything fit nice and snugly. I drilled some holes in the top and bottom of the window frame and secured it to the header and sill with some 3″ screws. The window was now in. Sweet!
The finishing tasks included screwing the OSB to the two new wall studs and window header and sill, trimming the plastic sheeting to fit, and securing it in place with duct tape. The wall is now solid, and the plastic sheeting ensures the wall around the window will be protected from the weather until I install siding and trim.
And viola! New window! The entire project took two hours, from start to finish, including cleaning up and putting away my tools. I have installed windows before, so this is something with which I have some practice. In addition, I knew I would be installing a window there, so I put in a temporary stud when I built the wall. I only had to remove it, rather than cut through it and shore it up. Also, I didn’t have to cut through any walls or siding, other than the single sheet of OSB. If I had had to do any of those things, then it would have taken longer.
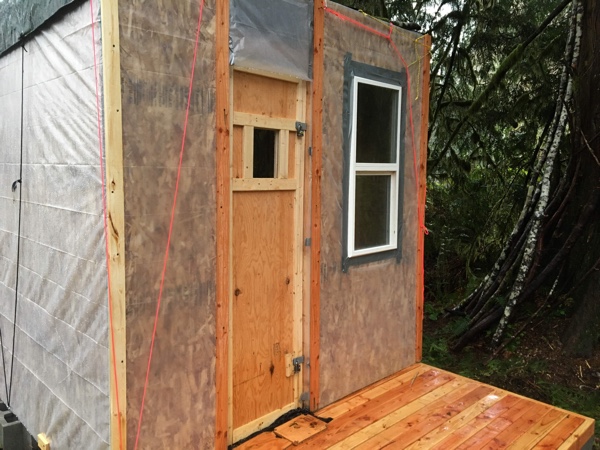
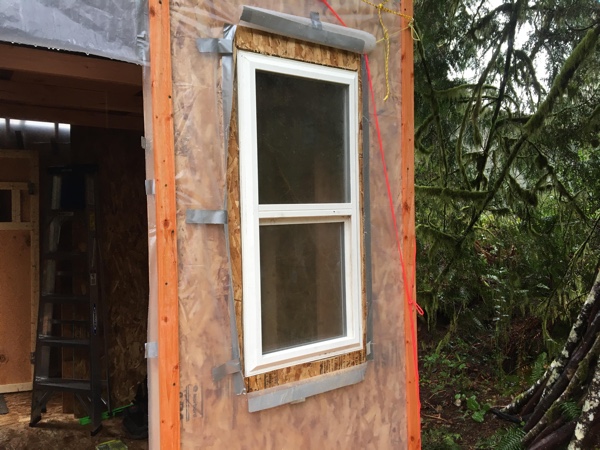 The new window floods the little cabin with light and provides great views of the river. Although it’s not in the best condition, it will work for now, and I am happy with it. It works well enough that I will probably put in all the other windows before replacing it.
After a short lunch break, I tackled the mud room. My plan here is to divide the room in half with a 24″ wall. The half with the back door will be the mud room and provide access to the main cabin. The other half will create a small area for a composting toilet and a hand washing station.
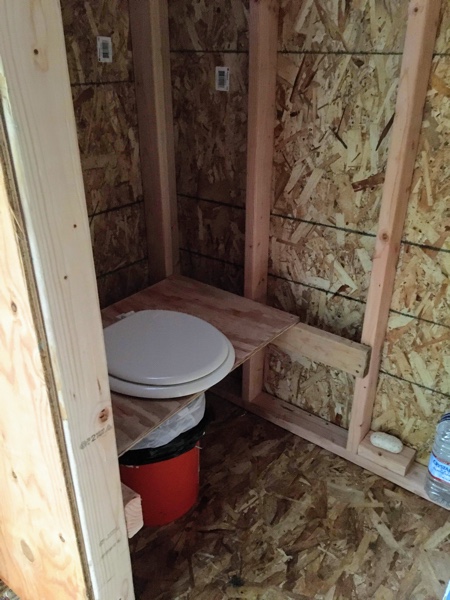
This project, too, should be pretty easy. I picked up a standard toilet seat at Home Depot last weekend and already cut an opening in a 31″ x 20″ plywood scrap to accommodate it. The toilet seat screwed into the plywood scrap, which would be supported by the half wall and the far side wall. I had a five-gallon bucket to sit underneath it. I would line the bucket with plastic bags and use composting material to absorb the waste and help control odor. I have used this method before for small festival gatherings, and it worked great!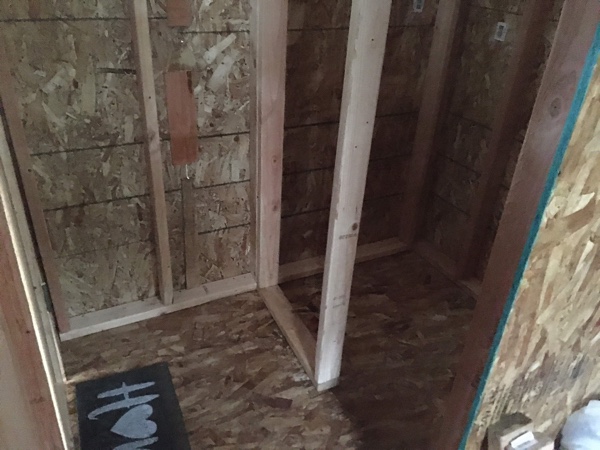
Since I already had the plywood cut and sanded, I only needed to frame the 24″ wall, attach a piece of plywood for privacy, and then add some 2×4 scraps to support the plywood loo platform. I’m not going to use a door here, but will add a privacy curtain at a later time. As expected, it didn’t take long; I finished in about an hour.
I did up a few more little tasks and shored up the plywood roof supports before heading out. I’d like to install the roof next weekend, as well as frame out the sleeping loft. I can do most of the loft framing at home, as I did the mud room extension, and that should save some time. However, the roof is still going to be difficult since I don’t have any help. I’m still not quite sure how I will do it, either. I’ll probably just have to figure it out on site next weekend.
 In addition, I’ll need to rehang the doors because the building has settled a bit. The studs around the front door seemed to have moved, shrinking the opening. I had to hit the top of the door a couple of times with my rubber mallet just to get it to close. Moreover, it’s sticking down at the floor, too. I’ll need to raise it and install a header to try to make the opening wider again. And the back door just hangs a little wonky. I need to put a header in there, too.
In all, it was a good day. Despite the heavy rain which left me soaked and, at times, cold, I got a lot done. The new window looks fabulous, and the little cabin is feeling less claustrophobic. But, I’m still not ready to stay in it overnight. I’m almost there, but not quite. I might give it a try next weekend, though. It should be warmer and the weather forecast is promising no rain.