
Saturday and Sunday, April 25 & 26, 2020
As usual, I waited all week for the weekend, eager to get going with my latest building plans. Also, as usual, I woke up Saturday morning, dreading my to-do list.
It’s not like it is extensive. Rather, it’s hard. Hard, heavy work. I knew my back was going to suffer.
 This weekend’s plans include replacing the second story floor with a new permanent one and installing carpet, adding another layer of OSB to the lower floor to strengthen it and reduce the “bounciness,” installing a daybed upstairs, installing the other two temporary plexiglass windows, and adding latches to the insides of both doors.
I picked up two sheets of OSB–now back to $10 a sheet–and two sheets of 3/4″ plywood earlier in the week and already cut them to size. I knew the floor is 89″ x 89″–the width of two sheets of OSB minus two 2x4s, so I didn’t have to worry about measuring anything first. The OSB was super easy–just three quick cuts. I trimmed both sheets to 89″ long, and the second to 41″ wide.
However, the plywood was a different matter. I had not thought about weight before I ordered it. As I discovered when I went to lift it out of the back of my truck, it’s too heavy. According to Popular Woodworking, a sheet of 3/4″ utility grade plywood can weigh more than 70 pounds. I can’t carry that by myself. I have trouble even dragging it!
 So, rather than three cuts as I had with the OSB, I made four with the plywood, trimming both sheets to 88″ long and 44″ wide. (Since the thick, heavy plywood is a bit much for my 18V circular saw, I left a one-inch clearance just in case things didn’t quite fit right.) Now, both are manageable.
I also trimmed the carpet to size for the upstairs, and cut out and marked the daybed pieces for assembly on site. Everything was ready to go. And, I had a truck load of food, tools, cushions, blankets, and other supplies. Big Red was so full, I could barely see anything in the rearview.
It was pouring rain when I left Olympia. But, it would give me a great opportunity to see how well my new roof was working. And, the weather forecast promised it would be gone by mid morning. So, perfect weather!
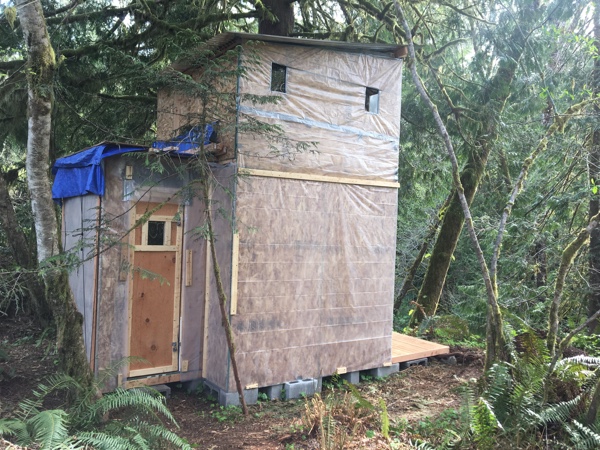 I was super happy when I got to my little cabin. I checked carefully for leaks, and, for the most part, it was bone dry. Only the mud room showed any signs of leakage, and it appeared to be through the gap between the main cabin and the temporary roof. But the new metal roof showed no signs of leakage at all. The two plexiglass windows I installed last week showed no leakage, either.
Well, time to get to work. I removed the scrap plywood that comprised the second floor and then the two support beams closest to the back door. I needed these removed so I had room to maneuver the plywood sheets into place. Once those were gone, I lifted the first sheet of plywood into place. It was still heavy, but manageable.
I debated where to put the ladder. In fact, I hadn’t even cut an opening for it in the plywood yet. I slid the single sheet of plywood around on the support beams, testing several potential locations. Finally, I decided to put it against the short wall in the back. It meant the top of the ladder would actually be cutting across the doorway, but high enough that I shouldn’t hit my head on it.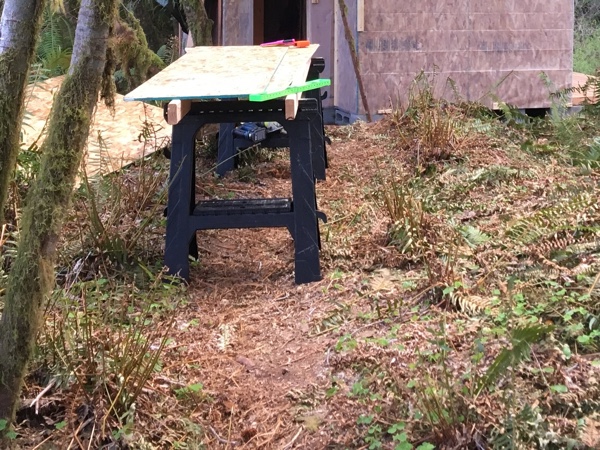
I measured the opening, and then outlined it on the second sheet of plywood.
I wrestled with that thing for probably a half hour, trying to get it up on my saw horses so I could cut it. As soon as I lifted an end to put it up on the second horse, the first horse would fold up and fall.
I tried placing a plywood scrap between them for stability, but the second horse still folded. Only this time, it came apart. Fortunately, it popped back together again pretty easily. Otherwise, I would have been royally f***.
Finally, I pounded the two support beams I’d removed from the second floor into the slots along the tops of the horses, and that did the trick. It still took a couple of tries, and I had to hold one horse in place with my foot. But, I got it up there.
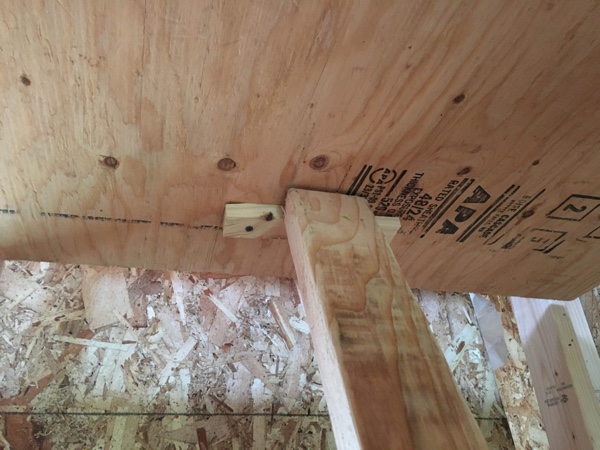
And surprisingly, my little 18V circular saw cut through the plywood with no problem.
A few minutes later, the second plywood sheet was in place.
And then the real work began.
 The first sheet of plywood was warped and curved downward toward the ground. I had to straighten it to get the final floor support beam in place, and that thing did not want to unbend.
I tried pounding a 2×4 under it, forcing it upward, and no joy. It would almost go high enough, but not quite. And, the 2×4 kept slipping.
Finally, I screwed a piece of furring to the underside to act as a lip and pounded the 2×4 into place. Chips flew from the lower floor as the 2×4 dug into the OSB. I didn’t care. I braced it with a 2×4 scrap, ramming it against the wall. It couldn’t move now. And the plywood was finally high enough for me to secure the beam.
What an ordeal! I removed the brace, secured the plywood, and laid down the carpet. It looked nice!
After four hours of struggling with the floor, I was tired and hungry. But, before stopping for lunch, I wanted to get the daybed platform in place. I could always assemble the frame later. But for now, I could relax on the cushions while I ate lunch. That was good enough for me!
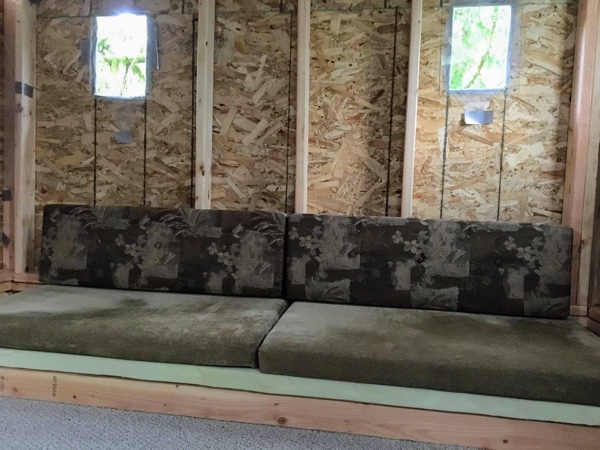 I was happily surprised how well the daybed worked out, even without a frame. I used the cushions from my trailer’s dinette and added another layer of foam underneath. Not only was it surprisingly comfortable, but it looked great, too!
Next up–adding the OSB to the lower floor. I only planned to add it to the main cabin, for now. And adding a second sheet over the top of the first sounds easy enough, right?
The thing about working in small spaces is there’s not much room to maneuver, especially when there’s crap all over the place. My cabin is always full of crap because it’s such a small space. I’m constantly moving stuff around, taking it outside, bringing it back in, moving it from one side of the room to the other, or moving it into the mud room and back out again. I swear I spend at least half my time just moving stuff around. And most of it is scrap wood and tools. I’m tired of dealing with it.
 When I first started this project, I had a lot of good quality, quarter sheet interior-grade plywood I salvaged from a construction site. I’ve been trying to protect it as best I could. But frankly, after using it as temporary roofing and temporary flooring, it’s taken a beating. I don’t care that much about it anymore.
I hauled it all outside, leaned it up against the side of the cabin, and wrapped it in a couple of tarps. It’s out of sight, and I don’t have to deal with it anymore. And I don’t care if it gets damaged or stolen.
What a relief!
The two sheets of OSB went down nicely, and the floor no longer bounces. But, the front door no longer cleared the floor. D’oh! I built 82″ doorways to accommodate 80″ doors. There should be more than enough clearance for an additional 1/2″ sheet of OSB. But, clearly not. I tried rehanging the door, but no matter what I did, there was simply not enough clearance. I either had to enlarge the doorway, or shrink the door.
Bloody hell! Well, my 18V circular saw surprised me by cutting so easily through the 3/4″ plywood, so perhaps it would surprise me by cutting through the bottom of the door, as well.
Nope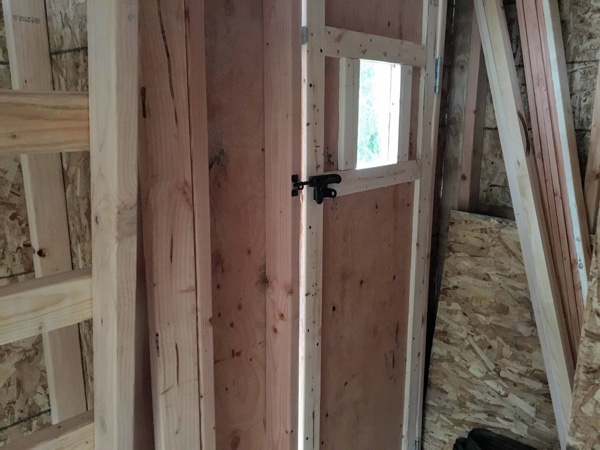 .
.
I tried hand sawing it. It looked like crap and took too long.
Finally, I broke out my sawzall. I knew my sawzall would cut it. And it did. In no time, the door was 1/4″ shorter. It still looked like crap, though. I sanded it the best I could and hoped no one would notice.
That was enough work for one day. Before I left, I hung a second tarp over the mud room. I used some eye screws to hang it about 18″ above the mud room roof. This should keep rain from splashing up onto the wall and running down the roof gap into the cabin.
It was a good day. The work took a lot longer than I thought it would, but I was happy with my progress. Especially my second floor. It really looked inviting!
Sunday
Before I headed out to River Song, I rebuilt my ladder. The new opening is only 20″ wide, and the 24″-wide ladder will no longer fit.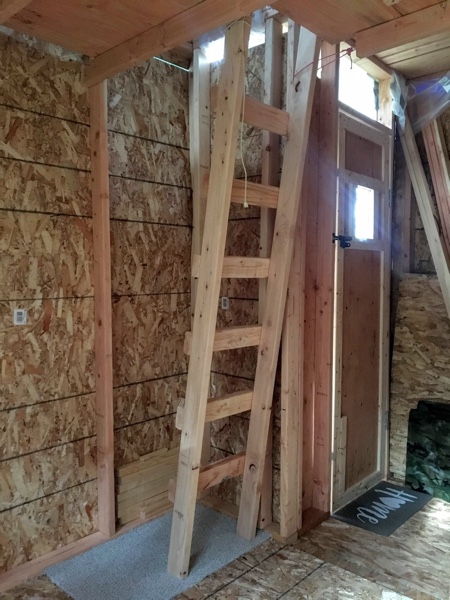 In addition, I trimmed the bottom of the ladder seven degrees to create a bit of an angle, enabling the ladder to sit firmly on the floor.
I had finished all of the big tasks yesterday, so today’s to-do list was just a few small tasks. In fact, I debated whether to even burn a third of a tank of gas, and in the end, decided to go. I don’t need to spend my entire time working hard. River Song is supposed to be a peaceful sanctuary, not a labor camp.
The rebuilt ladder fit perfectly. It takes up less horizontal space and barely intrudes into doorway leading to the back of the cabin. It’s such a relief to not have the ladder blocking the doorway anymore! And, there’s plenty of space between the ladder and the wall, so it’s easy to climb. There’s only one minor issue–I apparently rebuilt the ladder upside down. The bottom step is now too high, making that last step down a bit jarring. But, it’s an easy fix, and one I will save for next weekend.
I also installed the two temporary windows upstairs using a new tube of clear silicone. I now have four small windows upstairs. Unfortunately, I cut the openings for the two front windows too big, and I can’t find plexiglass sheets to fit. But, no rush. I’ll figure something out later.
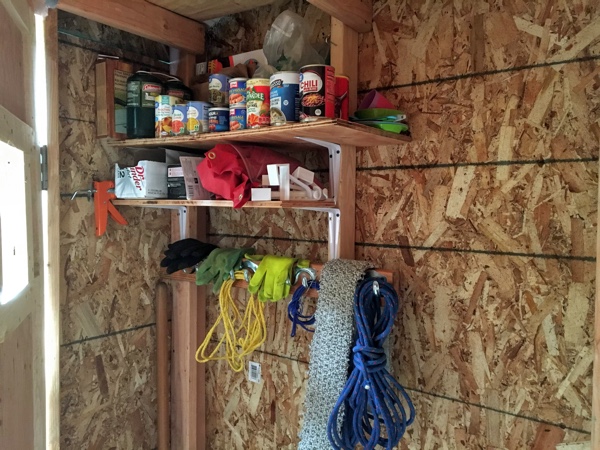 Before I headed out, I added a couple of shelves downstairs and a rack of hooks. Now I can finally start organizing stuff! I added some canned food, along with some utensils, a one-burner cookstove, and a couple of canisters of propane. And I screwed in a couple of lantern hooks to rafters and joists. It’s really starting to feel like home!
Lastly, I added a gate latch to the inside of each door. Now, I can secure the doors from the inside.
And with that, the cabin is ready for use. Phase I is done.