Presidents Day Weekend, 2020
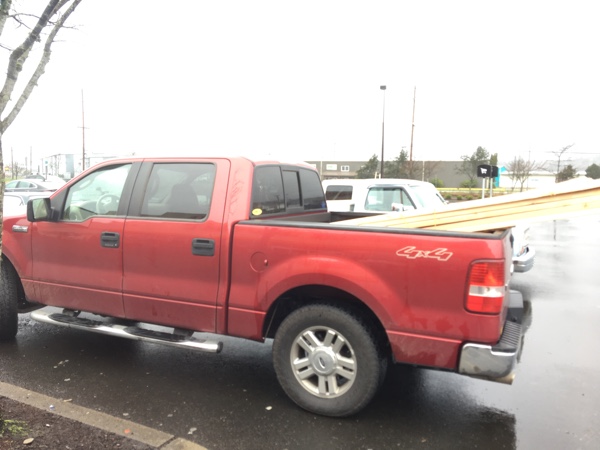
Day One: The weather promised to be crap Saturday and Sunday, but I didn’t care. I was eager to get started building my cabin! I packed all my tarps–and I have a LOT of tarps!–my tools, and everything I needed for spending the weekend working at River Song. I swung by Home Depot on the way and picked up the wood order I’d placed the night before.
 The weather was true to its promise–cold, and pouring down rain. But, I came prepared with a huge tarp to cover my work site. Before I could even get started building, however, I needed to bushwhack a new access trail. The original trail was too far from Big Red’s parking space for hauling heavy construction materials. And, it was full of tripping hazards.
It took a couple of hours to clear a new path. I blocked off the old one with fallen vine maples and set aside one to use as a barrier for the new path. When I was done, I had a nice, tripping-hazard-free trail. Sweet! Time to get to work!
 Moving the construction materials was hard work! Twelve cement blocks at 25 pounds each, forty 2×4 studs at nine pounds each, the equivalent of two sheets of 3/4″ plywood at 55 pounds each, plus drills, batteries, saws, a ladder, a shovel, a rake, two tool bags, and more. It was easily a half ton of materials and tools! My new trail already looked well used by the time I finished hauling everything.
It was already early afternoon by the time I got everything moved and the construction site tarped for protection from the pouring rain. I was exhausted and covered with dirt, but finally ready to start building. And, a friend arrived to help! I was so happy to see her pull up in front of Big Red! And, she was ready to get dirty.
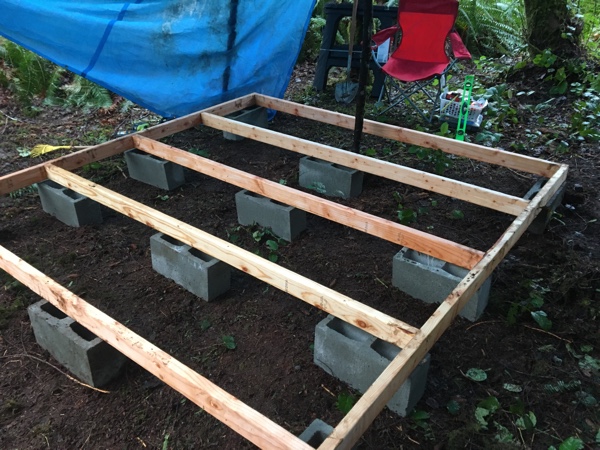
We worked together to level the cement foundation blocks and layout and assemble the floor. Although standard building procedures call for floor joists 16″ apart, I chose to build mine 24″ apart because I was using quarter sheets of 3/4″ plywood. I thought the 3/4″ plywood would be strong enough to not need 16″ joists. In retrospect, I should have followed standard procedures because the quarter sheets didn’t work out. It took a couple of hours to level everything and assemble the frame, and then another hour and a half trying to get the quarter sheets to line up. I finally gave up on the quarter sheets long after my friend had left and I ran out of daylight.
 Time to head home. But first, I had to haul everything everything back to Big Red, including the 33 unused 2x4s that weighed nine pounds each. And every muscle ached. I had planned to pitch my tent and stay on site for the weekend, but after all that rain and work and mud, there was no way. Not when home is only an hour away. I was cold and dirty and tired and hadn’t eaten anything all day. When I’m out here working, I don’t stop for anything. I barely even pause long enough to hydrate. I was pretty discouraged, too, as I hadn’t accomplished nearly as much as I had wanted.
Day Two: Sunday dawned bright and clear, and I was hopeful the weather would hold out. I should have known better! After all, River Song is in the Olympic Rainforest! It was cloudy and raining when I stopped at Home Depot for another order–this time, two sheets of 7/16″ OSB and three more cement blocks. The OSB was for my floor–a YouTube video I’d watched the previous night showed a professional builder using this as the flooring for a shed he built–and the cement blocks were for my foundation. I discovered I’d made a small miscalculation in my building plans that left me three blocks short yesterday.
 By the time I got to River Song, the sky had once again turned blue, but I still didn’t trust it. After all, this is the Olympic Rainforest, so I tarped my site again. And I’m glad I did, because as soon as I got the tarp up, it started hailing. Unbelievable! I spent the next hour walking around the site, poking at the blue tarp with a vine maple, knocking off the hail that kept threatening to drag the tarp down. I added more vine maple supports, as well. It’s a good thing I have lots of vine maples! As it was, my tarp was developing more and more leaks as it unraveled and vine maples poked holes in it. Sadly, its useful life was at an end.
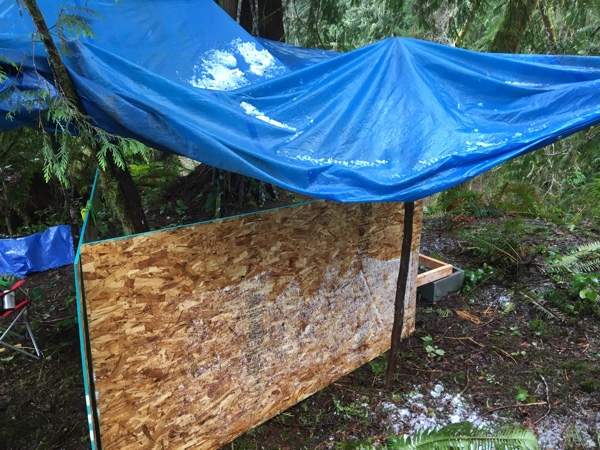
Finally, the hail turned to rain, and I was able to get to building. First, I had to remove all of the quarter sheets I’d installed the night before. It was a nice idea, but, as it turns out, not really cost effective. I had spent an hour and a half fruitlessly trying to get them to line up, when, as it turns out, the OSB was only ten bucks a sheet. D’oh! Lesson learned! Don’t always be a cheap ass! It took only ten minutes to install the OSB, well worth the $20! My new floor looked beautiful!
But, the OSB was soaked from being caught out in the hail. I dried it the best I could with a towel and then covered it with a tarp to protect it from the leaky overhead tarp.
 Next step–framing the walls. I have built foundations before as I’ve put up probably a half dozen storage sheds in my life. So I know how to do these. But I’ve never framed a wall. I did watch some YouTube videos and I’ve seen framed walls, so I had a pretty good idea. The biggest issue for me, really, was not framing the walls–my wall plans were pretty much the same as the floor plans–but rather getting the walls into place. I had hoped yesterday my floor would be done by the time my friend arrived and she could help me, but as usual, everything took much longer than expected.
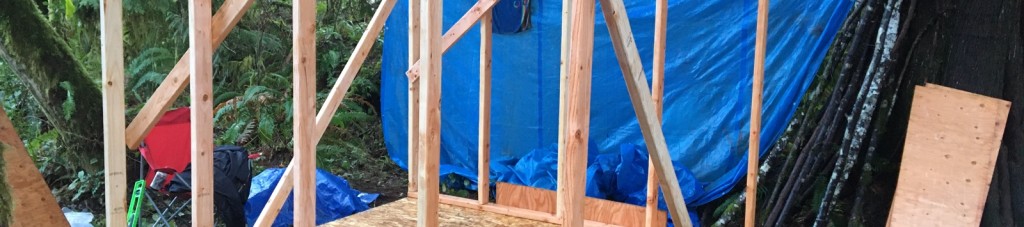
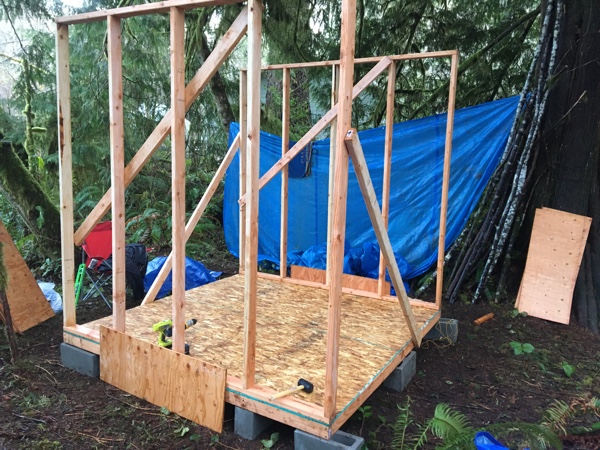
Which put me where I was today–having to frame and install the walls myself. It took less than an hour to frame and square the two side walls. Fortunately, by this time, it had stopped raining as I had to remove the overhead tarp to install them. Remember how I said 2×4 studs weigh nine pounds each? Each framed side wall used eight studs. I can’t lift 72 pounds by myself anymore. I might have been able to sling 80 pound bales of hay as a teenager, but I can’t anymore!
Fortunately, I’m wiser now. I figured out if I secured a plywood scrap to the floor frame, I could use it as a lip to keep the wall from sliding off the floor. And, I could secure a stud to a perpendicular floor joist to use as a swinging support arm. All I had to do was slide the wall across the floor to the lip, rotate it vertically, and then swing the support arm into place and screw it to the wall frame. The support arm and plywood scrap provided enough support to hold the wall in place while I finished securing it to the frame. Viola! It worked like a charm and took only about a half hour to install both side walls.
 I have to admit I was pretty impressed with my ingenuity! I added two more support studs and then called it a night. If I hadn’t run out of screws, I could have kept working. D’oh! Another Home Depot order!
Not only did I feel a lot more accomplished today, but I also felt better physically. I only brought backpacking food with me on Saturday, and I never took the time to stop and fix anything to eat. I felt like crap all day. However, I picked up a footlong sandwich, a salad, a banana, and a bottle of Ibuprofen this morning, and even though I never stopped working long enough to sit down and relax, I did take time to eat as I worked, and I took Ibuprofen when needed. Not only did I feel better, but if I had had more materials, I could have kept working.
Day Three: I had not planned on spending the entire long weekend working at River Song, but after yesterday’s progress, I wanted to keep going. I picked up another sandwich, salad, and banana on my way out of town, and then swung by Home Depot for order number three: a 6′ ladder, seven sheets of 7/16″ OSB for my walls, a pound of 3″ screws, a roll of duct tape, a roll of clear sheeting to cover the walls, two more foundation blocks, and a special camo tarp for my redneck roof.
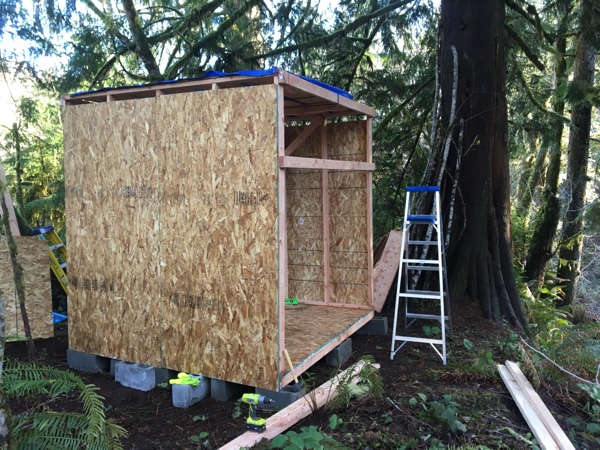 Putting up the OSB on the two side walls was super easy and took less than a half hour. My walls were square, and everything lined up great. All I had to do was stand the OSB on the two additional foundation blocks I’d just purchased, and screw it to the frame. Super easy! Before starting on the front and back walls, however, I wanted to put up a temporary roof. Even though the sky was blue and the weather forecast predicted no rain, I didn’t trust it. I wanted to protect my hard work and investment.
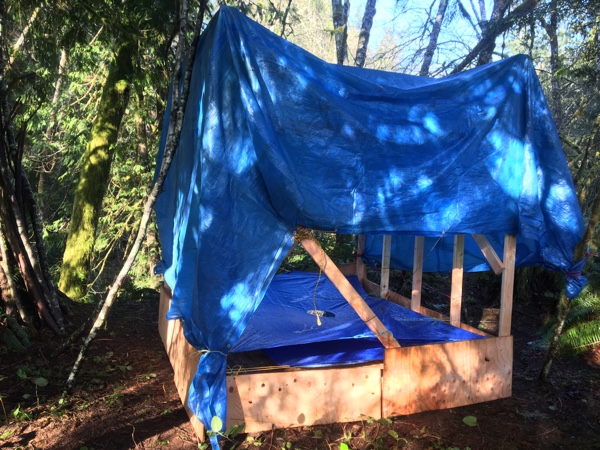
My plan is to put in a lean-to style roof with the higher end facing the river and a transom window above the front door. The roof would extend out four feet in front to cover a deck and four feet in back for a porch/mud room. But, for now, a “redneck roof” would do. For this, I would secure eight-foot long plywood scraps across the top of the frame, covered with tarps. I would first lay two blue tarps over the plywood scraps, and then cover the entire thing with the larger camo tarp. The blue tarps would protect the camo tarp from any sharp wood bits, and the camo tarp would be less visible. Because I don’t have to worry about snow load–it’s a rainforest, not a snow forest–this should be more than sufficient and work well for now.
 Sounds easy, right? That bloody redneck roof took hours to build!
I laid out the seven plywood scraps, all roughly a foot wide, and secured them on one side with screws. (I didn’t see the point of securing both sides.) For additional support, I decided to add two perpendicular 2x4s.
Easier said than done when there’s only one of you.
I finally figured out I could suspend the beam from the plywood scraps, which would hold it in place while I screwed it to the frame.
Did that, and went to secure it with screws.
Have I mentioned that my cabin is built four feet from the edge of the bluff? And the bluff drops forty feet straight down into a raging river?
OK, the river level is down significantly now from where it was last time I was out. It’s not raging anymore. It’s more just surly, like a teenager. In any event, it’s still a forty foot vertical drop.
Securing my roof beam means climbing a six-foot ladder four feet from the edge of a forty-foot cliff.
 I took a rope and tied my ladder to the cabin frame. If I were to fall with the ladder, I would, no doubt, go over the edge. But, if I were to fall off the ladder, I probably wouldn’t go over. This may or may not be true, but I chose to believe it. At least, long enough to get one screw in that roof beam!
And then I went to secure the other end of the beam, in a much safer area, 12 feet from the cliff. D’oh! I’m not sure if one or both of the two support studs were warped, but my beam was about an inch short. I tied a climbing rope to the two studs and pulled until my beam touched both. There was still a bit of a gap, but it was good enough for a temporary redneck roof! I secured the other end of the beam and called it good. That took more than an hour! Forget the second beam; I just left the rope in place. If necessary, it would provide a little support. But frankly, I just didn’t care anymore.
By this time, most of the day had already passed. I had only two hours of daylight left, and I still needed to frame in and install the front and back walls. I knew I needed an 89″ frame for the front and back, so I cut one of the studs to size, and d’oh! My redneck roof beam was in the way. I couldn’t install it! I’d have to remove the beam before I could frame in the front and back walls. I did not have the time or energy.
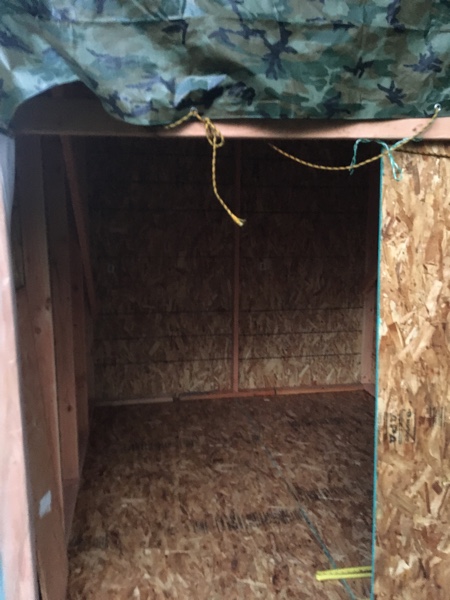
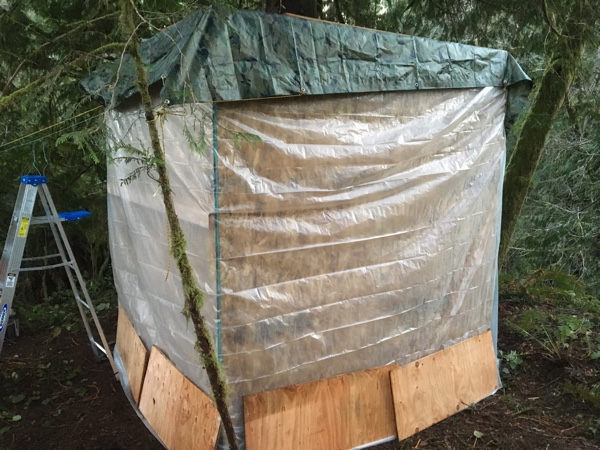
Plan B: Another temporary solution. There was no way I was hauling those three sheets of OSB home, and I couldn’t just leave them here; they’d get stolen for sure. But I could put them up temporarily, which would help prevent them from getting stolen and also help protect my cabin.
The sun was gone by the time I finished hanging the OSB and wrapping the exterior of the cabin with the protective plastic sheeting. I had hoped to have the entire thing framed this weekend, and I hadn’t accomplished that. However, I have a good start. I know what I have to do next weekend, and I can come out prepared. As it is, I have a floor, four walls, and a roof, so I do have a dry place to stay, and I can stay for the weekend.
Stay tuned for Cabin Building – Part 2!